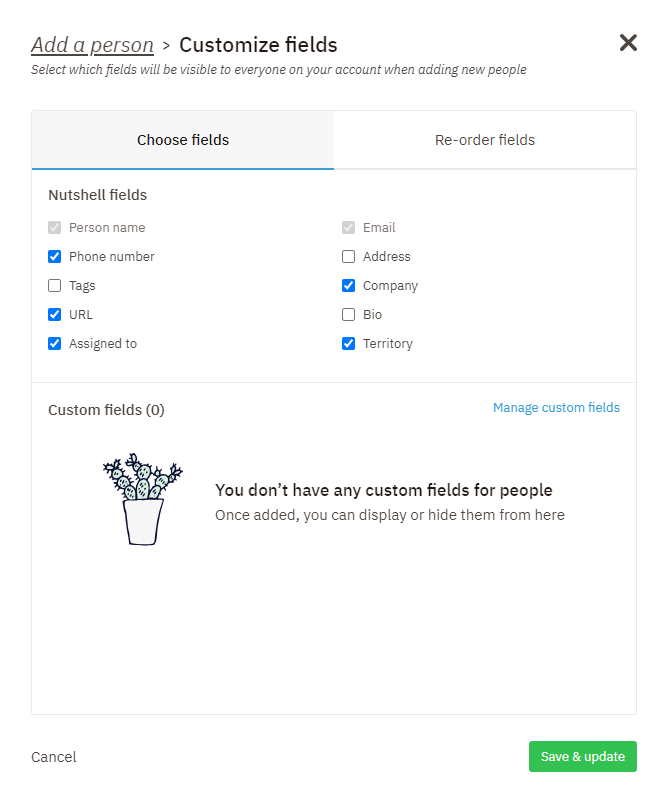
Introducing Customizable ‘Add New’ Dialogs for Tailored Data Collection

The best CRM for your team is the one that’s customized to your needs. That’s why we’re excited to introduce a new customization option within Nutshell—the ability to tailor your ‘add new’ dialogs to your business’s unique needs.

This update enables you to customize the fields in the pop-ups that appear when someone on your team creates a new person, company, or lead in Nutshell.

Here’s everything you need to know about this game-changing update.

Why customize your ‘add new’ dialogs?

Your CRM data collection process is at the core of your sales and marketing efforts. It’s how you gather crucial information about your leads, contacts, and companies. 

With customized ‘add new’ dialogs, administrators can now take full control of this process and ensure that the right information gets collected every time someone on your team adds data to Nutshell.

customizing add new fields in Nutshell

What elements of the dialog can you customize?

Here’s a closer look at what you can do with this new feature:

  • Decide which fields to show: With this update, you can handpick the Nutshell fields that are displayed when creating a new person, company, or lead. This ensures that your team only sees the information that’s important to your workflow.
  • Customize the field order: Every business has a unique way of working. Now, you can re-order fields in the ‘Add New’ dialog to match your specific requirements.
  • Set fields as optional or required: Ensure that essential information is never missed. You have the option to mark fields as required, guaranteeing that vital data is captured every time a new person, lead, or company is added.

How to get started with customizing your ‘add new’ dialogs

Here’s a step-by-step guide to help you harness the full potential of this feature:

Step 1: Access the create dialog

To begin customizing your dialogs, click the ‘Add New’ button in Nutshell. Admins will see a ‘Customize fields’ button in the top right corner of the dialog, which opens up the configuration options.

Step 2: Select fields

Once you open the configuration options, you can begin selecting the fields you want to include in the dialog by checking checkboxes.

You can also select or create custom fields to include in the dialog. To create custom fields, click on the ‘Manage custom fields’ link.

Step 3: Reorder fields and set required fields

In the ‘Re-order fields’ tab, you can rearrange fields and choose whether fields are required.

To re-order fields, simply drag and drop them into your desired order. Fixed default fields for the dialog are excluded from re-ordering.

In this step, you also have the option to designate certain fields as required by clicking the ‘Required’ checkbox. This ensures that crucial information is always filled in during the creation of a person, lead, or company.

Step 4: Save and update

Once you’re happy with your customized setup, click the ‘Save & update’ button to save your changes!

Tailor data collection to your needs with customized ‘add new’ dialogs

Ready to make the most of this feature? Start customizing your dialogs today to tailor your CRM experience to your unique needs and boost your team’s productivity.

Should you have questions or need assistance along the way, just check out our knowledge base article or reach out to our dedicated support team. Happy customizing!

BACK TO TOP

Join 30,000+ other sales and marketing professionals. Subscribe to our Sell to Win newsletter!